
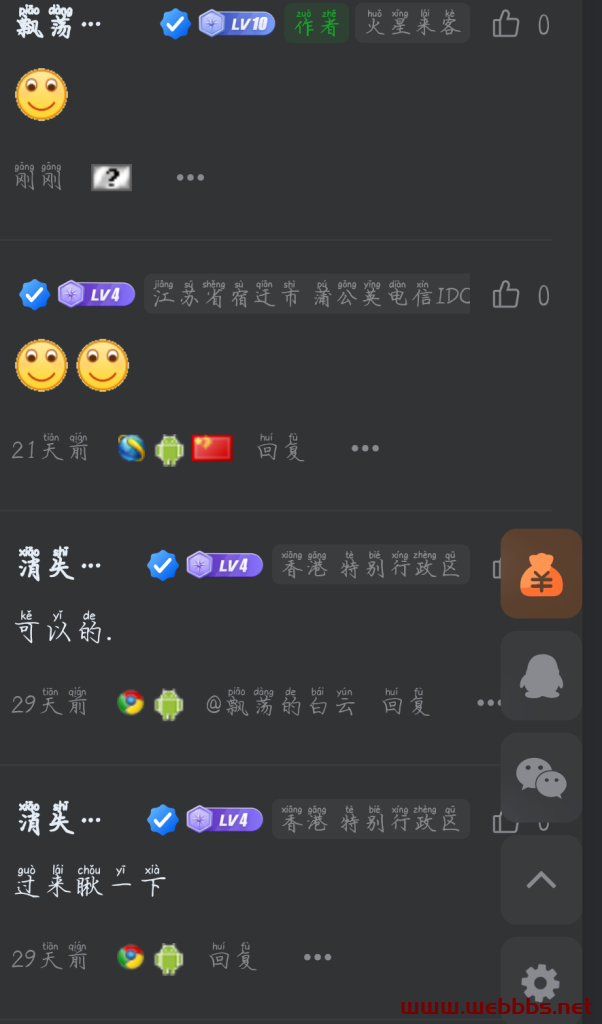
演示图
首先咱们先下载这个主文件
下载地址:
然后上传到程序子比主题,wp-content/themes/zibll目录里面,然后直接解压。
然后复制这个show-useragent文件目录,然后粘贴到网站根目录。
下面开始添加相关代码
1.在wp-content/themes/zibll目录的 functions.php文件里面添加两行代码
详情见图

代码如下:
include("show-useragent/show-useragent.php");   // 显示访客信息
include("show-useragent/ip2c-text.php");        // IP归属地和运营商查询功能
2. 将wp-content/themes/zibll/inc/functions目录下的zib-comments-list.php文件第51行的代码
注释掉并且添加代码如下图

代码如下:
$ip = convertip(get_comment_author_ip());
    return '<name class="flex ac flex1">' . $user_name . $badge .'<span class="badg badge badg-sm flex0 ml3">'.$ip.'</span>'.'</name>';
3. 然后咱们再找到第98行代码,然后注释掉,并且添加代码如下图
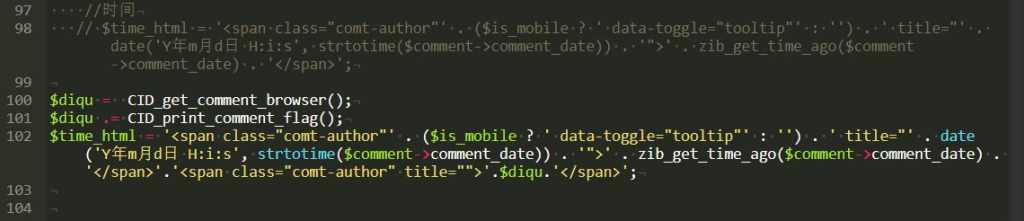
代码如下:
$diqu =  CID_get_comment_browser();
$diqu .= CID_print_comment_flag();
$time_html = '<span class="comt-author"' . ($is_mobile ? ' data-toggle="tooltip"' : '') . ' title="' . date('Y年m月d日 H:i:s', strtotime($comment->comment_date)) . '">' . zib_get_time_ago($comment->comment_date) . '</span>'.'<span class="comt-author" title="">'.$diqu.'</span>';
教程完毕!!!
没有回复内容